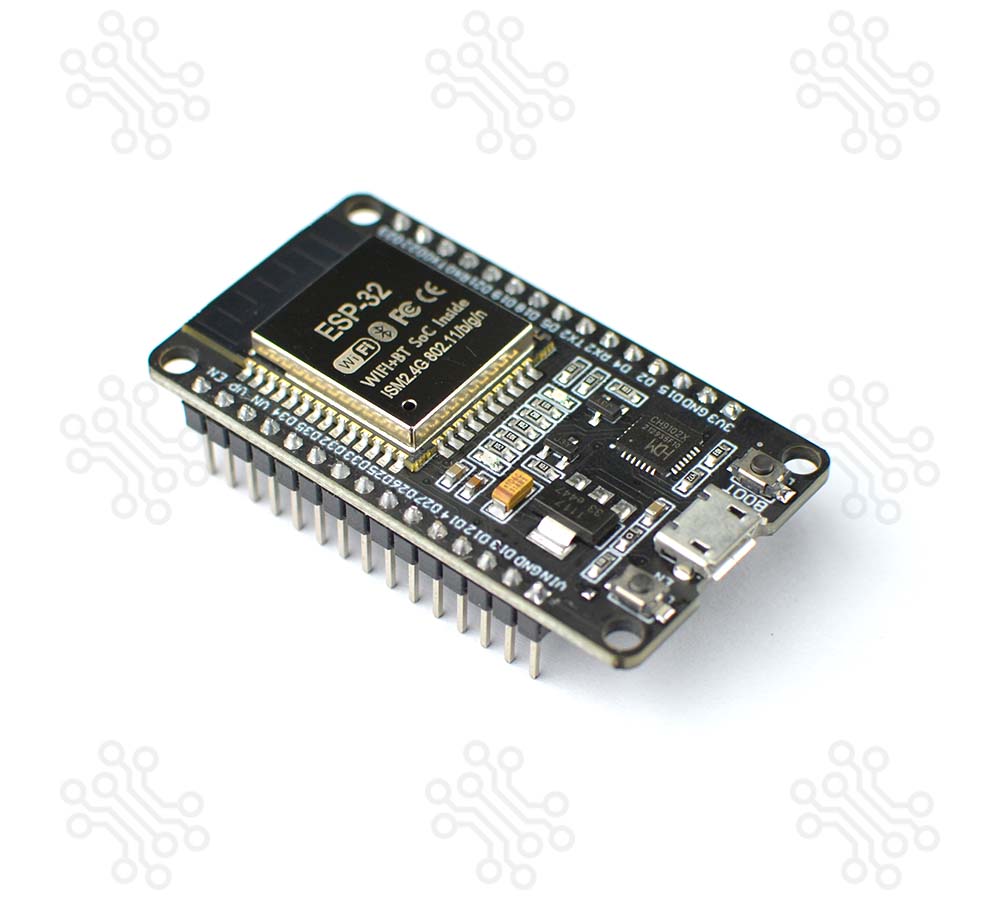
ESP32 WiFi + Bluetooth Development Module Ultra Low Power Consumption Dual core
Espressif
SKU: SPKMIC005 · Category: Microcontroller › Espressif
RWF 14,000
In stock
ESP32 development board featuring dual-core processing, built-in Wi-Fi and Bluetooth for IoT and embedded applications. This is the most popular ESP32 board and the best choice for beginners. It’s widely available, well-documented, and comes with everything you need to start programming right out of the box. Inside this module is a powerful processor called the Tensilica Xtensa® Dual-Core 32-bit LX6. This processor is similar to the one found in the older ESP8266, but has two CPU cores. This dual-core architecture is significantly faster than single-core MCUs (like the Arduino Uno or ESP8266), allowing it to handle complex tasks, such as running a web server and managing sensor data simultaneously.
Features
- Higher processor speed
- Bluetooth 4.2 BLE connectivity
- WiFi Connection(Station Mode) or WiFi Direct (Soft access point mode)
- 5 µA during Sleep Mode
- 9 Touch Pads – 9 GPIOs with capacitive touch sensing.
Specifications
- Flash size: 4MB
- WiFi Frequency: both 2.4GHz
- Driver: CP2102 from Silicon Labs
- Core: Tensilica Xtensa® Dual-Core 32-bit LX6
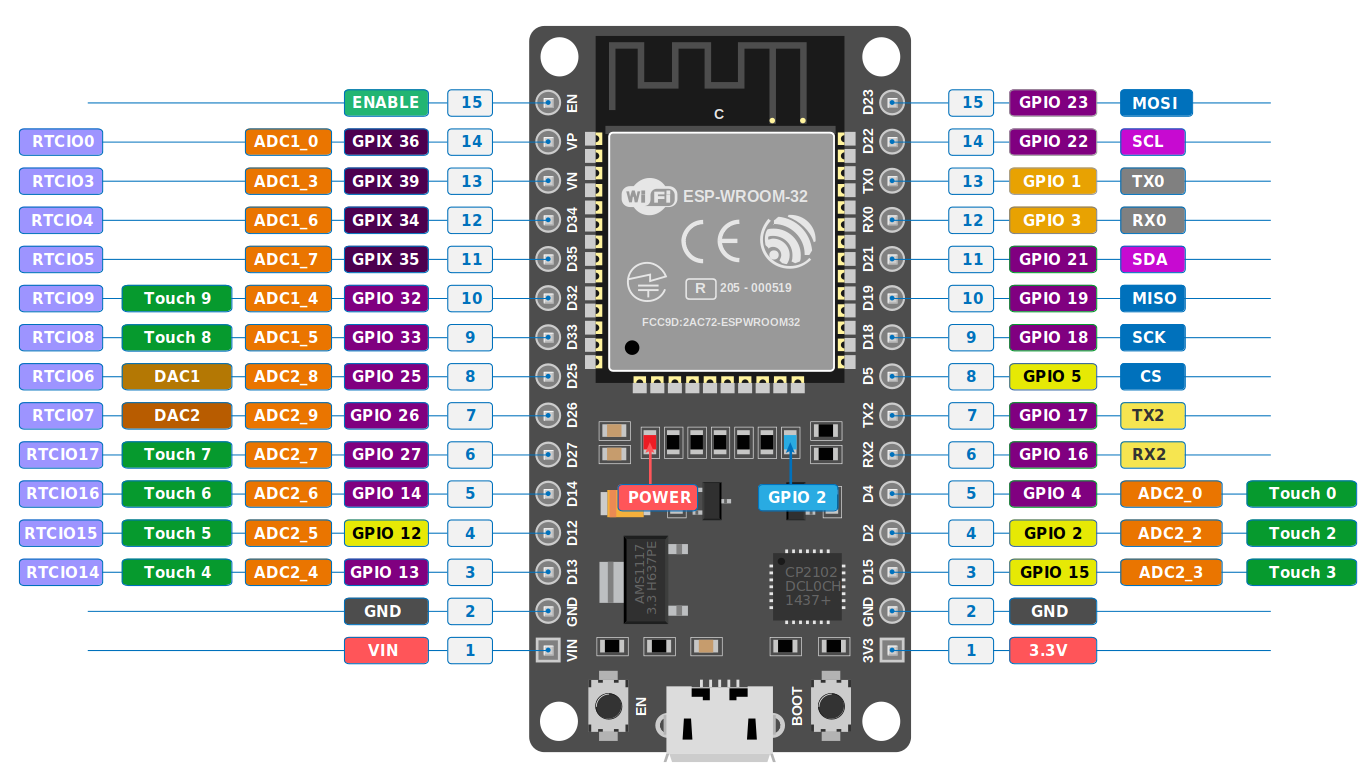
ESP32 Board Pinout
Putting ESP32 onto work
Since ESP32 and ESP8266 are both manufactured by Espressif, their path to being put into work is almost the same, only with a few differences. Installing ESP32 is from the start the same as doing so the ESP8266 except that it may sometimes, with newer Arduino IDE versions, occur in the boards manager for installation without a need for the link following below. But at some point it can be needed so, in that case, it passed too.
Boards manager URL to be pasted in the preferences, unlike that of ESP8266 changes to this below:
https://raw.githubusercontent.com/espressif/arduino-esp32/gh-pages/package_esp32_index.json
Then navigate to the boards manager as shown in the tutorial for its predecessor ESP8266, instead, search for ESP32 and click install. After the installation successfully finishes, go on to selecting the right board to use.
To get the right board and port, there are two ways (This applies to all boards supported in the IDE not only this one)
First way: Using search
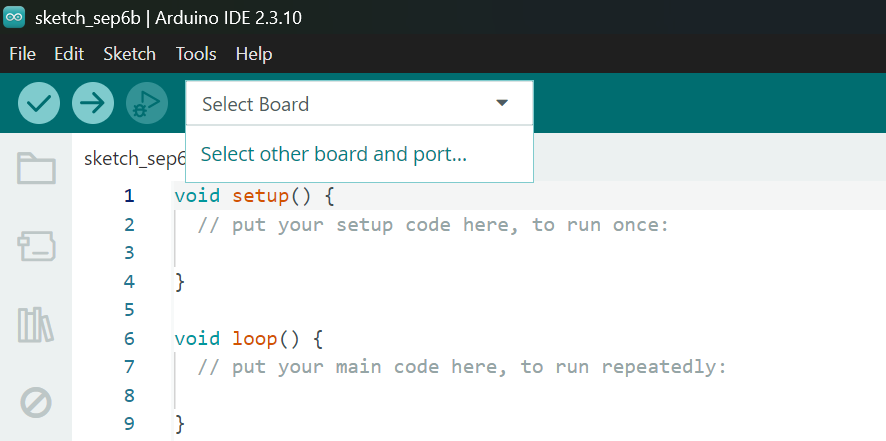
Click "Select other board and port"
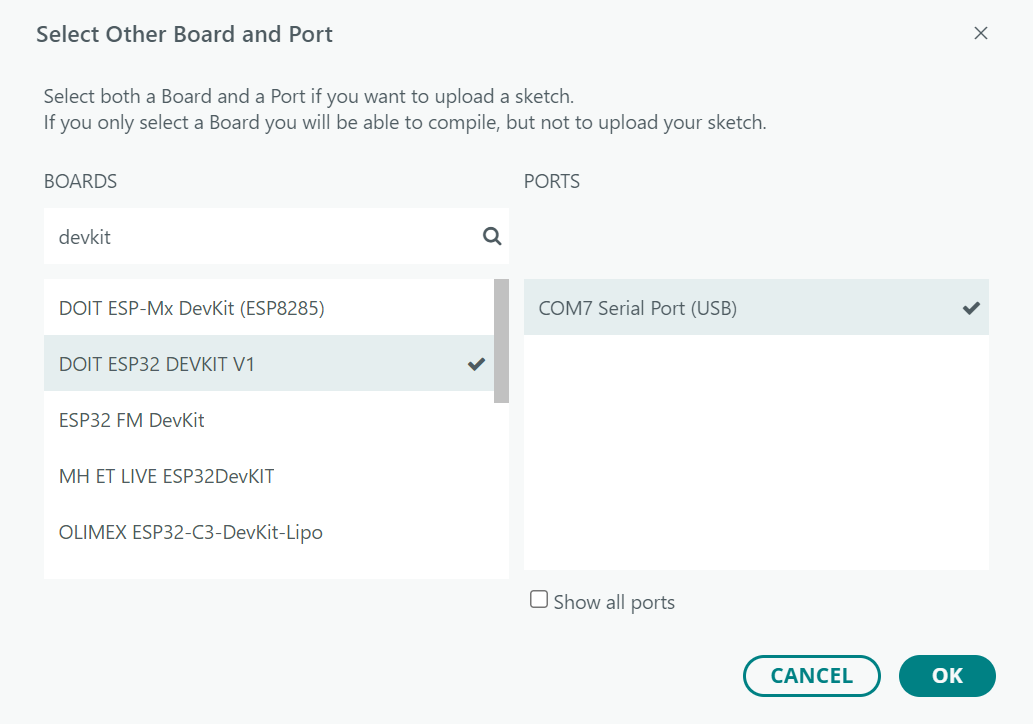
Use your words to search or the one used here and select the second option "DOIT ESP32 DEVKIT V1" and the right port for it and click "OK". You might not know which port is right when there appear more than one. In that case, Just unplug the board, check for that which disappears from the list and when you plug it back (into the same USB port it was) the port number appears again. Select that one!
Second way: Navigating through "Tools" tab
In the tool bar, select tools, then esp32 and lastly, the "DOIT ESP32 DEVKIT V1"
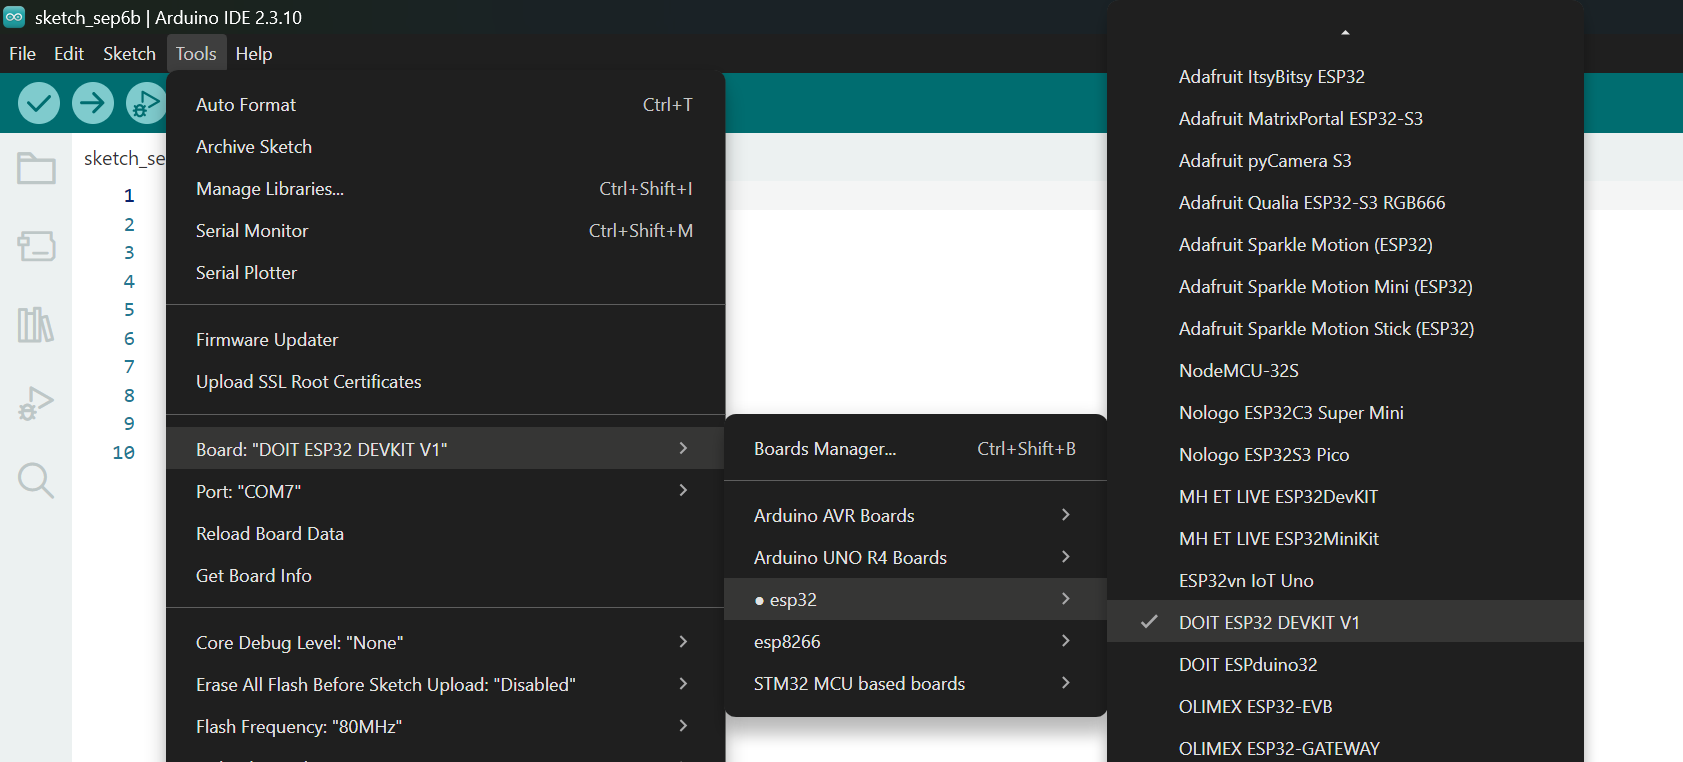
And then for the port, click tools again, the workaround of unplug and plug back works here too. After confirming the right port number, select it!
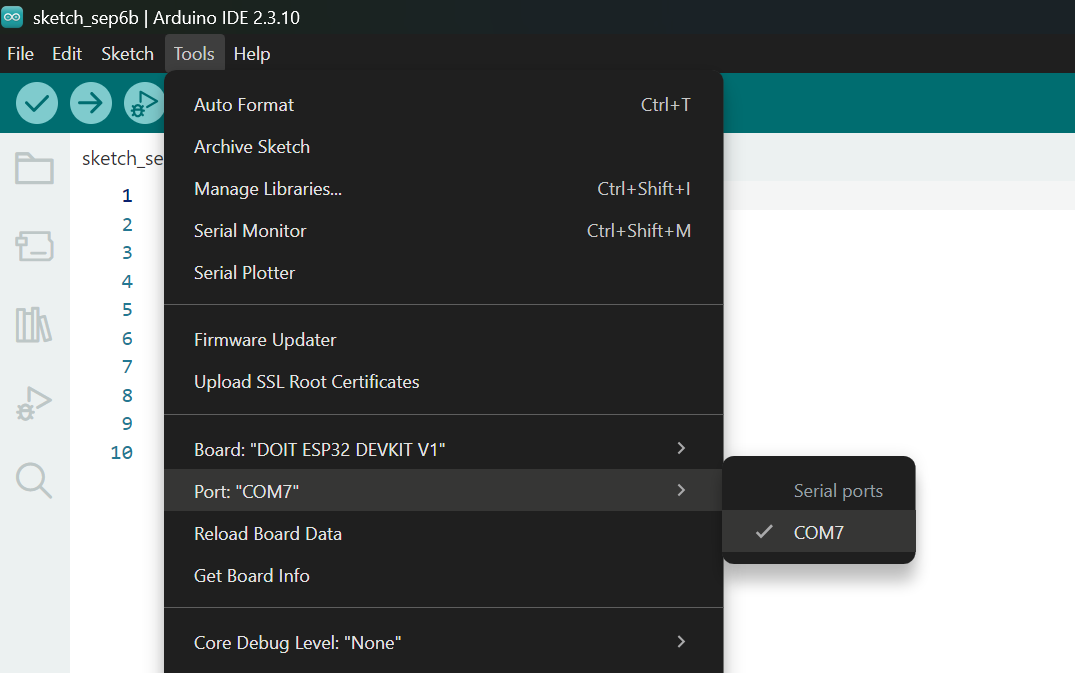
And that is it! Quick WiFi connectivity checking is shared below. Only the library changes compared to ESP8266
#include <WiFi.h>


// Replace with your network credentials
const char* ssid = "YOUR_WIFI_SSID";
const char* password = "YOUR_WIFI_PASSWORD";


void setup() {
  // Start Serial Monitor
  Serial.begin(115200);
  delay(10);


  // Connect to Wi-Fi
  Serial.println();
  Serial.println("Connecting to Wi-Fi...");
  WiFi.begin(ssid, password);


  // Wait until connected
  while (WiFi.status() != WL_CONNECTED) {
    delay(500);
    Serial.print(".");
  }


  // Print local IP once connected
  Serial.println("");
  Serial.println("Wi-Fi connected!");
  Serial.print("IP address: ");
  Serial.println(WiFi.localIP());
}


void loop() {
  // Nothing here for now
}