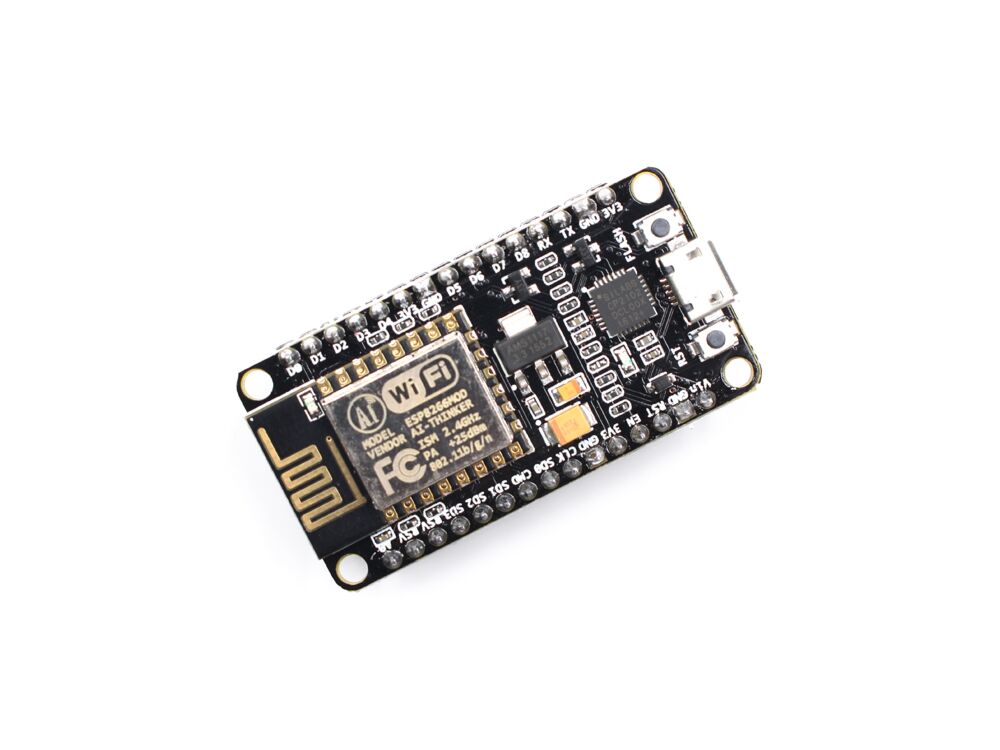
Nodemcu ESP8266 WiFi Development Board
SKU: SPKMIC001 · Category: Microcontroller › Espressif
RWF 11,000
In stock
The ESP8266 is a low-cost WiFi-enabled microcontroller, created and developed by Espressif Systems company. It is equipped with a Tensilica Xtensa® 32-bit LX106 RISC microprocessor at its heart that operates at an adjustable clock frequency of 80 to 160 MHz and supports RTOS. With its multiple power modes and dynamic power scaling, ESP8266 achieves ultra-low power consumption, making it ideal for use in mobile devices, wearable electronics and IoT applications.
It is preferred by makers and enthusiasts due to its compact size which allows it to fit into standard breadboards with extra points left for peripherals connection. Everything you need is already on the board: a micro-USB port with a CP2102 USB-to-serial chip for programming, an onboard 3.3 V regulator, and RESET and FLASH buttons. Plug it into your computer and it is ready to receive code from the Arduino IDE, MicroPython or the Espressif SDK — no extra programmer required.
Features
- Powerful processor of Xtensa® 32-bit LX106 RISC microprocessor
- Ultra-Low Power Consumption
- WiFi Connection(Station Mode) or WiFi Direct (Soft access point mode)
- Supports many communication modes such as UART, SPI, I2C, I2S, PWM
- Many development platforms like Arduino IDE, MicroPython, Espressif SDK etc.
- 11 usable digital GPIO pins and 1 analog pin
- Plug-and-play USB programming through the CP2102 chip
Specifications
- WiFi Frequency: 2.4GHz
- Core: Xtensa® 32-bit LX106 RISC microprocessor
- Chip / Module: ESP8266EX on ESP-12E
- Driver: CP2102 from Silicon Labs
- Operating voltage: 2.5V - 3.6V
- Flash memory size: 4MB
- Power input: 5 V via micro-USB or VIN pin
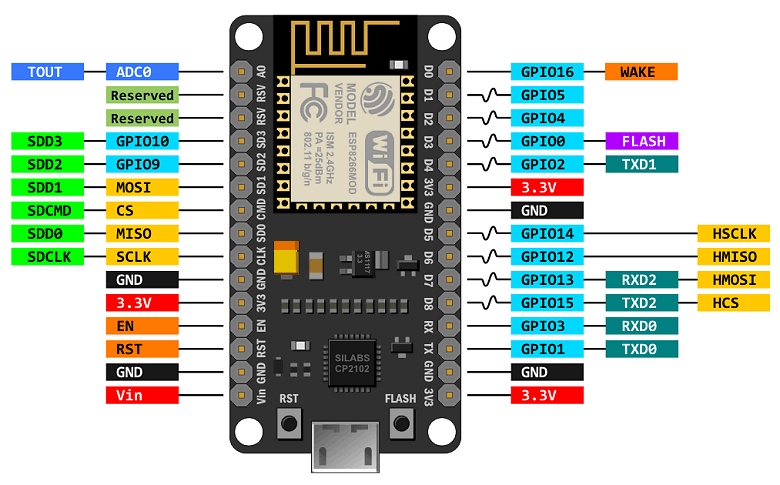
Nodemcu ESP8266 Pinout
Getting started with ESP8266
To start using with ESP8266, there are some workarounds you need to first to have it communicate with your computer and eventually receive the code you upload into it. First, you need a development platform of choice from the listed above but here we use the Arduino IDE
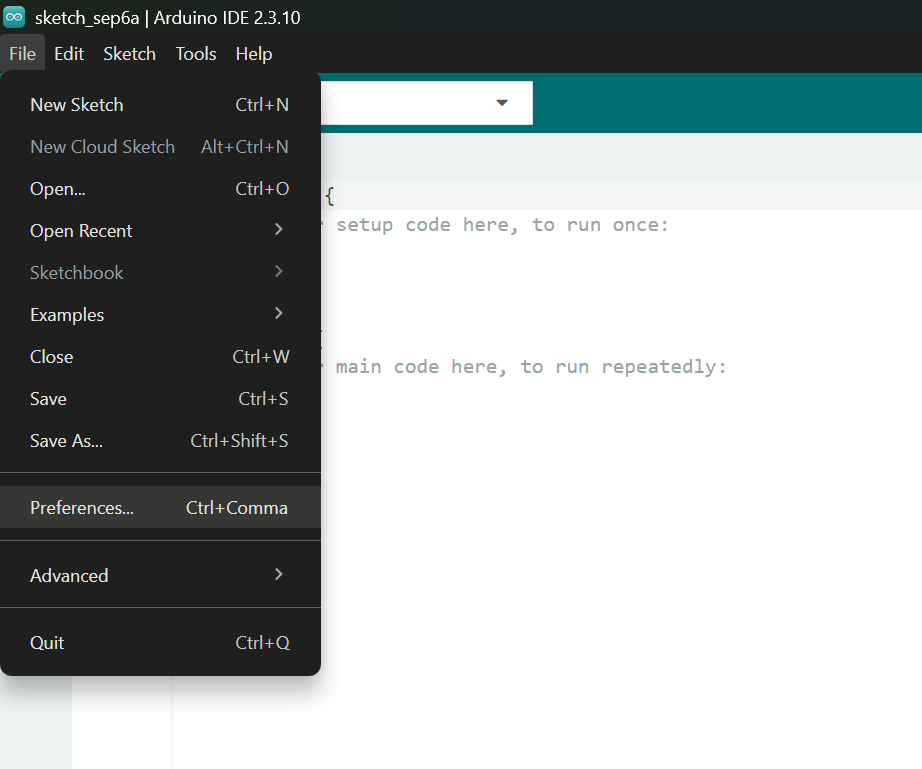
So, start with downloading and installing it into your computer, then navigate to File > Preferences
In the “Additional Board Manager URLs” field, fill the link below
http://arduino.esp8266.com/stable/package_esp8266com_index.json
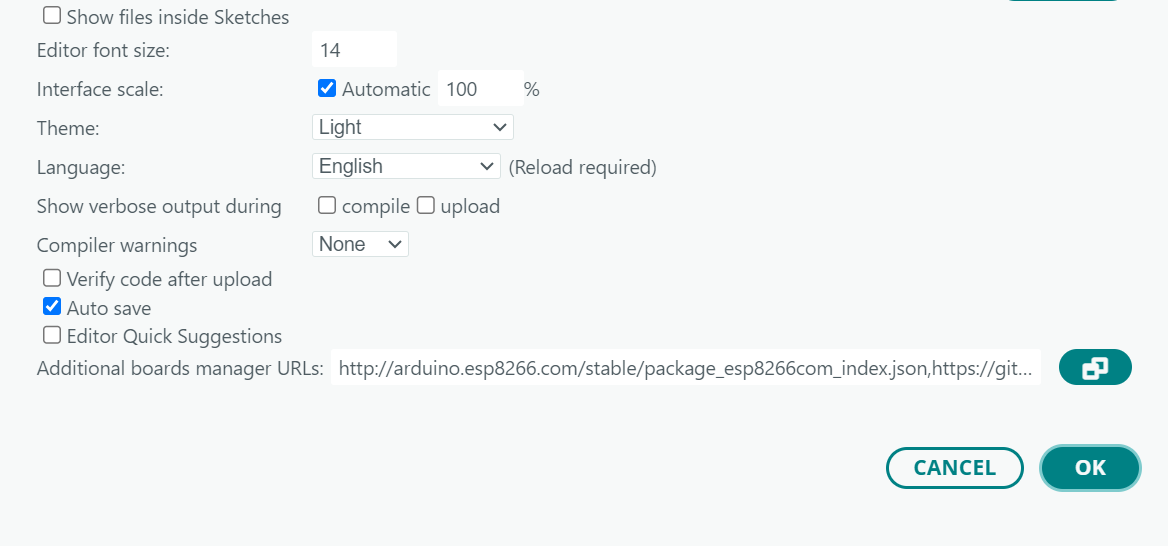
If there are other boards' URLs, place a comma in-between, then click "OK". Only then can the ESP8266 board appear in the boards manager for download. Go on then installing the board. Click boards manager; the second icon in the left side menu as the picture shows and type ESP8266 in the search box and click install
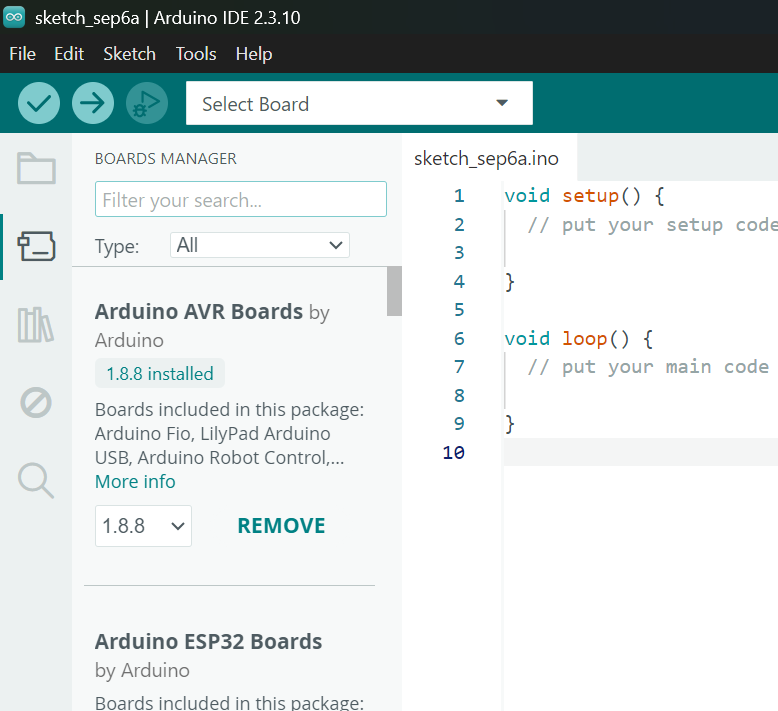
After successful installation, your development field is ready! Go on and select the board for this specific one in the IDE
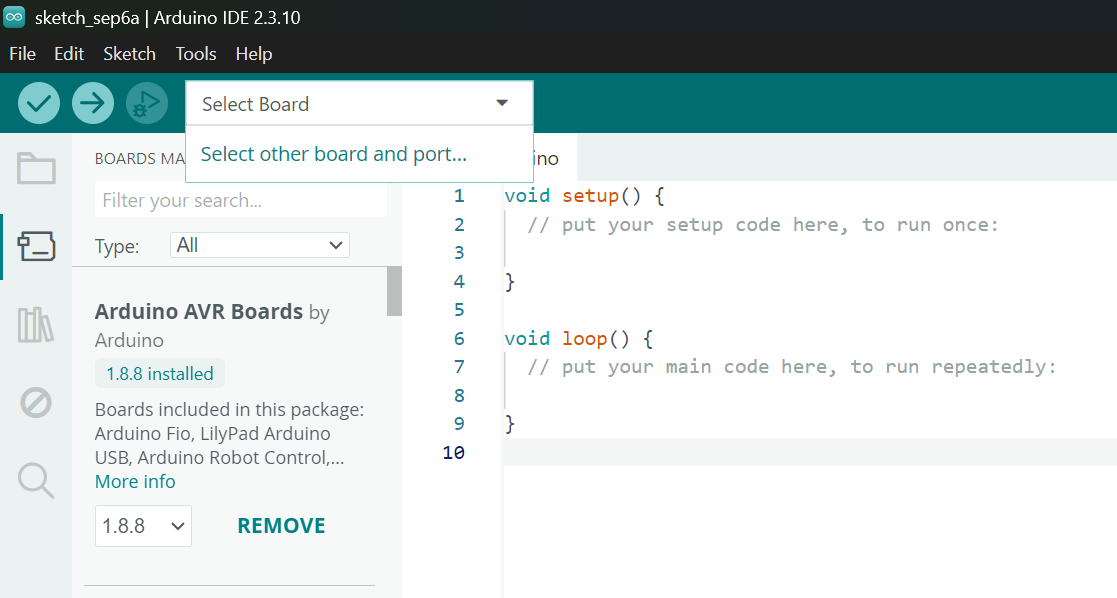
Click select other board in the top drop down menu and type "Nodemcu"
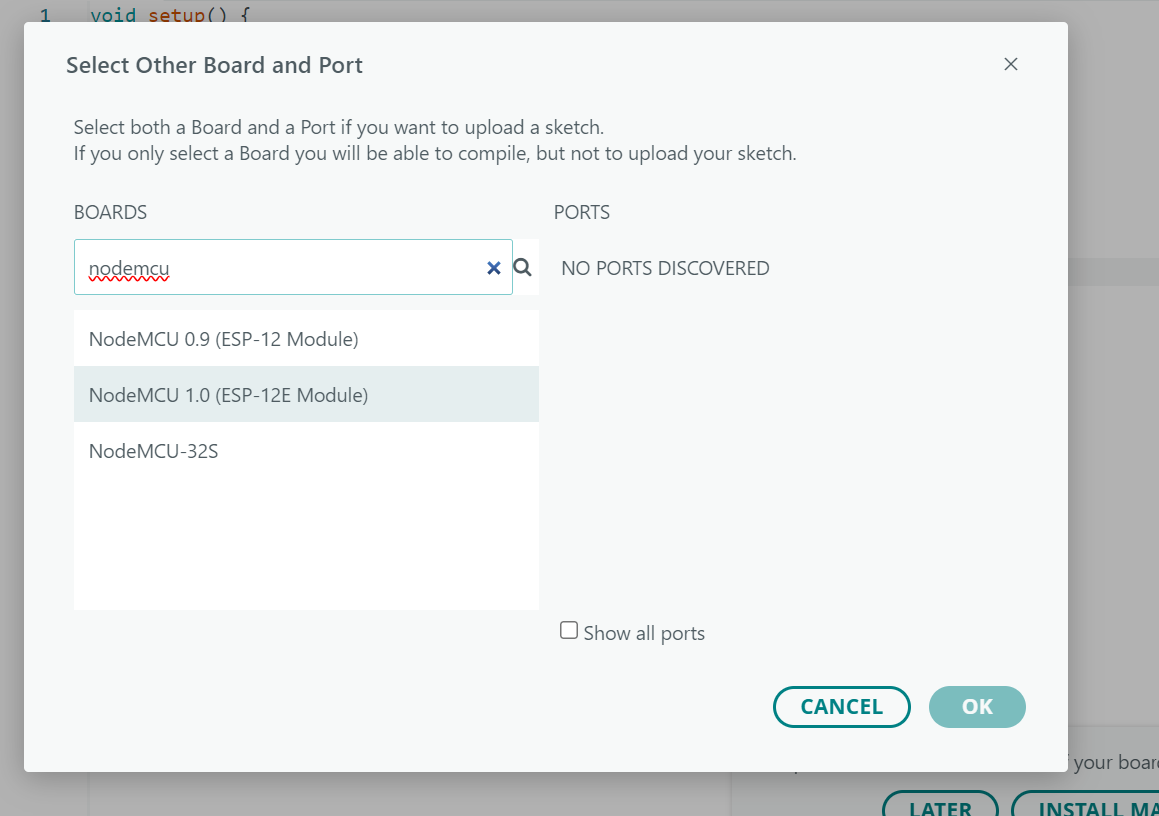
Either selection of the first two in the results works well with this board and when the board is plugged, the port for it appears below the ports title and you need to select it too, then click OK.
You can start with simple builtin examples in the IDE like below or start you creativity already.
#include <ESP8266WiFi.h>


// Replace with your network credentials
const char* ssid = "YOUR_WIFI_SSID";
const char* password = "YOUR_WIFI_PASSWORD";


void setup() {
  // Start Serial Monitor
  Serial.begin(115200);
  delay(10);


  // Connect to Wi-Fi
  Serial.println();
  Serial.println("Connecting to Wi-Fi...");
  WiFi.begin(ssid, password);


  // Wait until connected
  while (WiFi.status() != WL_CONNECTED) {
    delay(500);
    Serial.print(".");
  }


  // Print local IP once connected
  Serial.println("");
  Serial.println("Wi-Fi connected!");
  Serial.print("IP address: ");
  Serial.println(WiFi.localIP());
}


void loop() {
  // Nothing here for now
}